Frequently Asked Questions
In the following section, some FAQs on the topic of digital teaching have been compiled for you. Click through different sections. You can find further guidance and assistance on the website of the Digital Teaching and Learning Team.
Fequently asked Questions regarding Webmeetings

© Diva Plavalaguna, pexels.com
Zoom Meeting
In the following section, questions regarding the programme "Zoom" will primarily be addressed. A more comprehensive overview of helpful tools for video conferences and their areas of use can be found in the digital tool catalogue.
Zoom Pro licenses are available to every member of staff at TU Wien for teaching purposes. The duration of Zoom meetings is not limited. Current information and comments can be found on Zoom can be found in the digital tool catalogue.
At TU Wien, Zoom is available with an education licence that has no time limit and is suitable for meetings with up to 300 participants. If you add a Zoom activity in TUWEL and use Zoom for your teaching in this way, you automatically use this licence.
If this is not sufficient for your purposes and you need to upgrade your account, please contact the Zoom Support by e-mail at support@zoom.tuwien.ac.at. You can also find more information on Zoom in the digital tool catalogue.
In principle, the use of the downloaded software is recommended, as it offers more functions than the respective online versions available in the browser. However, it is possible to participate in Zoom meetings via the browser. Please note that this option can also be specifically deactivated by the host (i.e. the person who creates the meeting).
If you click on the small arrow to the right of the microphone symbol in a zoom meeting, you can change the active audio source for both the microphone and the loudspeaker.
Note, however, that only one source can be selected for the microphone or for the loudspeaker at a time. For example, two audio sources for the microphone cannot be transmitted simultaneously in one session.
Yes, the chat can be deactivated in Zoom. In principle, however, the chat should not be completely deactivated in meetings. It can be very helpful as a communication channel in the background for the meeting participants.
You can deactivate the chat by clicking on "More options" under "Chat" (symbol with the three dots). The following options are available under "The participant can chat with":
- None: Participants cannot send chat messages to anyone.
- Host only: Participants can only send private chat messages to hosts and co-hosts. There is no general chat.
- Everyone public: Participants can post chat messages in the general chat of the meeting and send private messages to the hosts and co-hosts.
- Everyone public and connected: All participants can send public and private chat messages to all participants and hosts/co-hosts.
You can also restrict the chat for a meeting in advance online in the Zoom settings, opens an external URL in a new window. These restrictions then apply to this host for all future meetings, unless you change the restriction again.
Attention: If you deactivate the chat in advance, you cannot activate it again during the meeting!
Zoom offers the option "Breakout Session", which allows users to be temporarily divided into small groups within a Zoom meeting. The allocation of users to rooms can either be done manually or automatically. A third option is to allow meeting participants to choose which room they want to join.
With automatic allocation, it is possible to define the number of participants and sessions. Furthermore, participants can be allowed to return to the main session from their breakout session, or they can be forbidden to do so if necessary. Note that only hosts can create breakout sessions and switch between sessions. Co-hosts cannot do this. You can also assign the host role to other people during a meeting, giving them presentation rights. For more details, see the section on presentation rights.
If the chat is restricted in Zoom in a breakout session, these restrictions only apply to the main session. In the individual breakout sessions, all participants can always communicate with all other participants within their own session. However, participants cannot communicate with participants outside their own session in the breakout sessions.
Yes, the chat can be saved. To do this, open the chat menu in the chat via the symbol with the three dots and then select the option "Save chat". In the zoom settings, opens an external URL in a new window, you can restrict participants from saving the chat. Please note, however, that this does not prevent the taking of screenshots and the manual transcription of the chat.
You can create Zoom meetings directly in TUWEL using the activity "Zoom".
Please note that you have to communicate the dates of the created meetings to your students, as they are not automatically informed about them. To do this, you can send them a message via TISS or via the TUWEL message forum, for example, in which you refer to the created zoom appointments.
Note: After creating zoom meetings in TUWEL, a calendar entry is created in the corresponding TUWEL course with the meeting appointment, via which all students in the course can join your meeting. This also happens if you create the zoom activity hidden or define prerequisites for it. If you want to test the activity before the first meeting, remember to delete the calendar entry again or do not set a specific date for internal test meetings by checking the checkbox "Recurring meeting" and selecting the option "No Fixed Time" under "Recurrence". For subsequent course dates, it is recommended to enter the exact meeting dates so that they appear in your TUWEL course and in the TUWEL calendar.
For a TUWEL course, only one zoom activity is required. All meetings of the course can be created via this activity, also by different persons of the course team.
Yes, recurring Zoom meetings can also take place at different times. To do this, select the checkbox "Recurring meeting" in the settings online and then select one of the options "Daily", "Weekly" or "Monthly" under "Recurrence". For the time being, enter the time and duration of any appointment.
To adjust the time and duration of individual appointments or to add individual recurring appointments, you must log in to https://tuwien.zoom.us/, opens an external URL in a new window and access the meeting settings. Adjusting the times cannot be done directly via TUWEL. After logging in, click on the name of your meeting to manage it. Then click on the option "Show all occurrences" in the "Time" section to display all appointments.
Next to each appointment you will find the options "Edit" and "Delete". With a click on "Edit" you can change the time and the duration of any appointment. Furthermore, you can remove individual appointments with the "Delete" button.
With the option "Add another session" at the end of the list you can add further appointments with any desired time and duration.
These changes will also be displayed in your TUWEL course. If you have opened the appointment overview in your zoom activity in TUWEL, you must reload it to see the changes in the overview.
In the settings, you can allow students to switch on their microphone at any time to ask questions. If you do not wish to do this, students can alternatively write their questions in the chat. Questions asked in the chat can be answered either immediately or collectively at the end of the meeting. If you choose to answer collectively, it can be helpful to have another person collect all the questions in the chat to keep track of them. This will allow you to focus on your presentation and not be constantly interrupted.
Note that students can also raise their hand digitally by clicking on the appropriate icon in the "Reactions" menu. In this case, a hand symbol appears in the tile of the respective student, the tile gets a coloured border and jumps to the upper left corner of the screen. In addition, other forms of non-verbal feedback are available to students, which are displayed as symbols in the corner of the respective tile, e.g. "yes/no" or "faster/slower".
In EDIN- the e-didactic guide, opens an external URL in a new window you will find further helpful tips for online teaching with large numbers of participants.
For courses in online format, we recommend keeping meeting IDs for Zoom meetings so that students do not have to constantly call up new meeting rooms. In the following cases, the meeting ID remains the same:
- If you create a meeting and activate the option "Recurring Meeting", all recurring appointments of the meeting will have the same meeting ID.
- If you activate the option "Personal Meeting-ID", your personal meeting room is used for each meeting. All meetings for which this option is activated will therefore have the same meeting ID.
- If you edit the appointment of a past meeting so that it is in the future, the meeting ID for the new appointment is retained.
Yes, students can draw attention to themselves in Zoom by using the "Raise Hand" option in the "Reactions" menu. A hand icon will then appear in the student's tile, the tile will have a coloured border and will jump to the top left corner of the screen. In addition, other forms of non-verbal feedback are available to students, which are displayed as symbols in the corner of the respective tile, e.g. "yes/no" or "faster/slower".
It is recommended to shorten the presentation time of lectures in online format and to reduce it to about half. For example, if a lecture lasts 20 minutes in a face-to-face format, it should be shortened to 10 minutes in a distance learning format. Furthermore, breaks should be scheduled during the seminar to maintain attention.
Interactivity can be promoted, for example, as follows:
- Surveys can be included in Zoom or discussions can be held via chat.
- To collect comments and feedback on presentations together, an interactive whiteboard can be used in Zoom.
- Asynchronous work can be built in to save time and bandwidth. For example, anonymous feedback can be given via TUWEL or TUWEL voting can be used for individual questions.
For longer discussions on a topic, discussion entries can be created in a TUWEL discussion forum.
In EDIN- the e-didactic guide, opens an external URL in a new window you will find further helpful tips for promoting interactivity in online lessons.
Yes, Zoom meetings can be recorded. How much storage space is used for this varies - but an approximate guideline is about 500 MB of storage for about 1 hour of recording.
Instead, you can record your meetings locally on your computer and upload them to LectureTube Upload.
You can provide recordings via the Zoom Cloud directly in the Zoom activity in the TUWEL course. Alternatively, you can record your meetings locally on your computer and then upload them via LectureTube using TUWEL. A guide can be found in the LectureTube Knowledge Base, opens an external URL in a new window.
Yes, you can also assign presentation rights to other users.
- Before the meeting: Users who are to receive presentation rights must have a Zoom account with their TU Wien e-mail address. If users are to be given presentation rights before the meeting, for example, in order to be able to start a meeting themselves, enter the TU Wien e-mail address of the respective users to whom you want to give presentation rights in the "Alternative hosts" field when creating the meeting via TUWEL. Before the "Alternative hosts" defined in this way can enter the meeting room, they must log in with their Zoom account.
- During the meeting: You can also give users presentation rights during the meeting. To do this, right-click on a name in the participants list and assign the user the role of "co-host". Note, however, that co-hosts cannot start meetings themselves. You can also make other users "hosts" in the same way.
In the meeting settings, the checkbox "Enable waiting room" can be activated. This means that when participants enter the meeting, they are first in a waiting room, from which they can be brought into the meeting room by the hosts and co-hosts.
Frequently asked questions for the Online Tool TUWEL
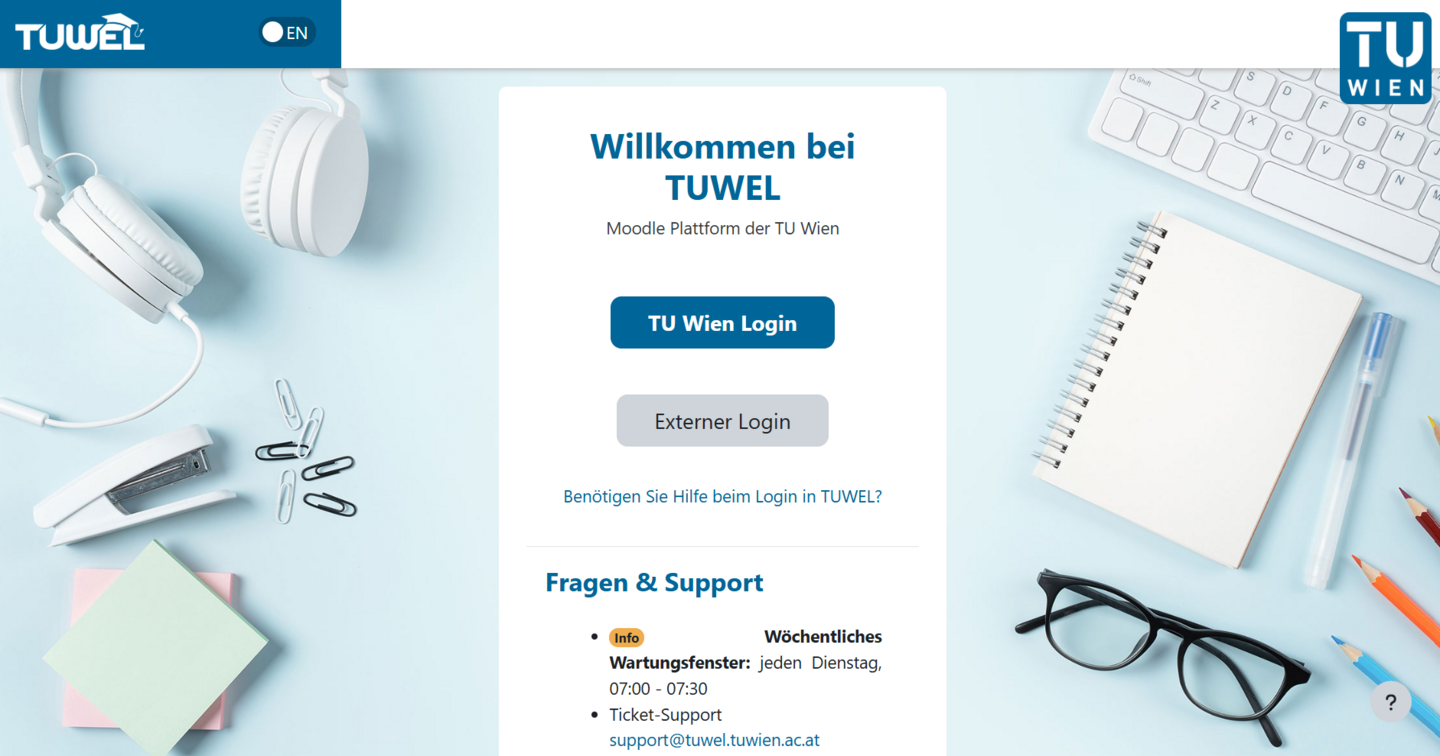
TUWEL login page
TUWEL is the central learning platform of the TU Wien and stands for "Technische Universität Wien E-Learning" (Technical University of Vienna E-Learning).
TUWEL, opens an external URL in a new window is based on the open-source software Moodle, opens an external URL in a new window, one of the most widely used learning platforms in the world.
TUWEL is operated in collaboration between the two departments Digital Teaching and Learning and Educational Technologies, opens an external URL in a new window.
In every TUWEL course, a message forum is set up by default, more or less as a notice board. However, only course leaders and tutors can use this forum. A new forum must be created so that students can not only read contributions, but also create and comment on them themselves.
Further information and detailed instructions can be found in EDIN - the e-didactic guide, opens an external URL in a new window, in the TUWEL tutorial course and in the guide “Use forum, opens an external URL in a new window”
The option "Best score" indicates the overall score of the TUWEL online test. This only corresponds to the "Sum of Scores" when the test questions are created for the first time. If the scores of individual test questions are changed afterwards, only the value "Sum of scores" will be adjusted accordingly. If you change the scores of individual test questions, it is recommended that you finally adjust the "Best Score" accordingly to avoid false or misleading scores by the system.
More information and detailed instructions on this can be found in the TUWEL Tutorial Course, opens an external URL in a new window and in the guide “Create an online quiz, opens an external URL in a new window”.
You can easily upload self-produced videos to your TUWEL course using LectureTube and make them available to students (as an episode or series).
You can find a guide to this in the LectureTube Knowledge Base, opens an external URL in a new window.
No - currently this function is only available in TUWEL for the activity "Assignment".
When using an activity "Assignment", the option "Require that students accept the submission statement" can be activated in the settings of the activity under the item "Submission settings". When submitting an assignment, students must then confirm the autonomy of the work performed by clicking on the corresponding checkbox before they can save their submission.
Unfortunately, no similar function is available for the activity "Quiz". However, you can place a clearly visible notice in the description text of the activity - it is advisable to use bold formatting and the font colour red. This could, for example, read as follows: "By starting the test, you confirm that it is your own performance and that no unauthorised aids are being used".
Further information can be found in the Guideline for Conducting Online Examinations, opens an external URL in a new window in the coLAB-Space Distance Learning Good Practice, opens an external URL in a new window. There, alternatively, the template for an affidavit for online examinations, opens an external URL in a new window can be downloaded, which must be completed and uploaded by the students on TUWEL.
For a TUWEL course, only one zoom activity is required. All meetings of the course can be created via this activity, also by different persons of the course team.
Further information on the integration of Zoom meetings in TUWEL can be found in the section "Web meetings / Zoom".
Yes, questions in TUWEL online quizzes can be shuffled so that they are in a random order for each test run.
More information on the functionalities of online quizzes in TUWEL can be found in the TUWEL Tutorial Course, opens an external URL in a new window.
To answer students' questions during a TUWEL online test, you have the following options:
- Zoom meeting: You can start a parallel zoom meeting and collect the questions asked, e.g. via the chat, and answer them via the microphone.
- TUWEL Group Messages: You can create a group in TUWEL with all participants and activate group messages for them to enable joint communication between all group members.
- TUWEL Personal Messages: Students can send you their questions in a personal TUWEL message. After selecting the participants, the answers can be sent to them via a personal TUWEL message.
- TUWEL message forum or text page: The message forum or a text page in a topic section can be used to inform about new announcements. In this case, the page must be regularly reloaded by students by pressing the F5 key, which is why this option is not recommended.
- Matrix Chat
- Announcement of a telephone number
- Setting up a specific course e-mail address
It is imperative that you clearly communicate to students, before they take the TUWEL online test, how they can contact you if they have any questions.
No, this is not possible. There is no provision for download blocking in TUWEL.
As soon as you make materials and content available to students in TUWEL (in whatever form), there is a possibility that they will be passed on by the students. Keep in mind that such a possibility would not be useful at all, as users of your materials and content could create screenshots, for example, even if they were blocked from downloading, which could then be passed on as images.
Yes, roles of enrolled users in a TUWEL course can be changed.
Further information and detailed instructions can be found in the TUWEL Tutorial Course, opens an external URL in a new window in the guide “Roles in TUWEL, opens an external URL in a new window”.
To find out how to enrol users in a TUWEL course with a specific role, e.g. LVA-Leiter/in, see the question “Can I enrol other users in a TUWEL course and assign them the role ”LVA-Leiter/in"?".
Yes, you can enrol other users in a TUWEL course with the role "LVA-Leiter/in".
Further information and detailed instructions can be found in the TUWEL Tutorial Course, opens an external URL in a new window in the guide “Enrollment and role management, opens an external URL in a new window”.
If only one test attempt is allowed for users in your test activity, you can ignore the section "Multiple attempts" in the settings. This is only relevant if more than one attempt should be allowed in your TUWEL online test and a question can therefore occur repeatedly in different attempts.
Yes, you can set questions to award minus points for incorrect answers.
When you edit a question, you can define negative percentages for the assessment for each of the answer options, if required. These negative percentages are then included in the evaluation as minus points.
Note: If you have set the option "Allow only one answer" (i.e. Single Choice) for your questions and assign negative percentages for the evaluation, the total evaluation of a question can also become negative. However, if you have activated the option "Allow multiple answers" for your questions (i.e. multiple choice), the total evaluation of a question cannot become negative.
Further information and detailed instructions can be found in the TUWEL Tutorial Course, opens an external URL in a new window in the guide “Create Multiple Choice Questions, opens an external URL in a new window”.
Yes, you can grant students a grace period for an assignment via TUWEL.
Further information and detailed instructions can be found in the TUWEL Tutorial Course, opens an external URL in a new window in the guide “Create and grade assignment, opens an external URL in a new window”.
Yes, participation in TUWEL online tests can be restricted to students who are registered for an exam in TISS. To do this, proceed as follows:
- Navigate to “Get TISS data” as described in the “Get TISS data” guide.
- Select the option “Exam dates only”, select the relevant exam date and click on “Start update”.
- Now enter the group with the examination date as a prerequisite for the online quiz in order to restrict the quiz to the students registered for this examination date.
Note: Do not import the TISS data until after the end of the registration or deregistration period in TISS so that no more registrations or deregistrations can occur afterwards. If you have already carried out the import before, check the checkbox "Remove all group members from the selected exams before the group update" when importing again. This ensures a one-time synchronisation with TISS when importing the data.
Further information and detailed instructions can be found in the TUWEL Tutorial Course, opens an external URL in a new window in the guides “Get Tiss data, opens an external URL in a new window” and “Define restrict access, opens an external URL in a new window”
Experience has shown that TUWEL online tests work without problems with up to 200 participants. If more than 200 people are to take part in a TUWEL online test for your course, it is recommended to hold the test in two to three tranches at different times. You can do this via groups. With the function "Group changes" you can set group-specific start and end times, duration etc. In this way, the tranches can be started at different times.
The guide “Online quiz: grade essay questions manually, opens an external URL in a new window” describes how you can proceed here.
Information on how to take online exams can also be found in coLAB under EDIN, opens an external URL in a new window (only available in German).
No - if you click on the link "Preview" in the editing mode of a question from your question collection, you will only be shown a preview of the selected question. In this preview you can test the different attempt and display options. However, these changes do not affect the settings of the question. They only affect the preview that is displayed.
With some question types, teachers can query calculated values from students in the activity "Test". There are some aspects to consider when entering decimal separators.
What to consider when entering decimal separators?
In English, Moodle uses a period as the decimal separator. In German, a comma is used as the decimal separator. This specifically affects the following numeric question types: "Simply Calculated, opens an external URL in a new window", "Calculated, opens an external URL in a new window", "Calculated Multiple Choice, opens an external URL in a new window", "Numerical, opens an external URL in a new window" and "Embedded Answers (Cloze), opens an external URL in a new window".
When creating the questions, always use the decimal separator appropriate to the selected language:
For German - comma (e.g.: 10,5).
For English - period (e.g.: 10.5)
The individual language settings of the students affect the decimal separator, German - comma / English - period, when answering the questions. Point out this aspect to your students in the LVA or in the description of the test.
Tip: If all students should use the same decimal separator, then the course language can be defined in the course settings in the section "Appearance" (German > comma, English > period).
Can thousands separators be used?
Thousands separators to make it easier to read large numbers are generally not supported in Moodle, for example 1,000 for 1000.
More information can be found here, opens an external URL in a new window.
LectureTube/LectureTube Studio/LectureTube Upload in general
You can easily upload self-produced videos to your TUWEL course using LectureTube and make them available to students (as an episode or series). You can access this function in your TUWEL course.
You can also make recordings in lecture halls with LectureTube equipment.
Note: All guides for LectureTube can be found in the Lecture Tube Knowledge Base, opens an external URL in a new window.
In order for the sound to be recorded, you must use an auditorium microphone. Do not forget to switch this on and make sure it is working. You should also hear the sound in the lecture hall yourself throughout the recording. If this is not the case, the sound will not be recorded.
As soon as the start time of the programming is reached, the recording layout will be reset to the default settings. If you want to make changes to the recording layout (e.g. camera only, beamer only or camera and beamer), you must therefore make them after the start time of the recording. On the touch panel in the lecture hall, you can see the image being recorded during the recording. If this does not correspond to the desired layout, the recording layout must be changed on the touch panel.
If a programmed LectureTube recording is manually stopped and restarted, it can no longer be automatically assigned to your series. Therefore, please do not stop programmed recordings. All recorded videos are cut to the actual duration of the lecture at the beginning and the end in one processing step. In the lecture hall, you only need to adjust the layout if necessary, otherwise no further interaction with the recording device is necessary.
Should it ever happen that you have started a recording manually in the lecture hall, please contact support@lecturetube.tuwien.ac.at.
After recording, the recorded video is being processed. Depending on the current workload of LectureTube, it may take a few hours up to a few days until the recording is processed and visible to you.
If your recording is not online after one week at the latest, please contact support@lecturetube.tuwien.ac.at.
You can upload self-produced videos to your TUWEL course using LectureTube and make them available to students (as an episode or series). You can find information how to proceed in the LectureTube Knowledge Base, opens an external URL in a new window.
LectureTube Studio for recording videos via browser
Familiarise yourself with the guides for LectureTube Studio in the LectureTube Knowledge Base, opens an external URL in a new window. Create a short test recording at the beginning to get to know the functionality of LectureTube Studio better before you record videos for your courses. It is best not to upload this test recording to LectureTube so that it does not appear in your LectureTube series with the regular videos. If necessary, you can download it locally on your computer.
You can update your browser to the latest version or use an alternative browser. If you are still unsuccessful, please contact support@lecturetube.tuwien.ac.at.
It is best to reload the page or manually give the browser access to the devices you want to use for the recording using the icon in front of the address bar.
It is best to reload the page and check that the browser has been given permission to access your screen.
It is best to reload the page and check that the browser has been given permission to access your camera. Also make sure that no other application is accessing the same camera device.
Check that the correct audio source is selected. When speaking, the signal level must move in order for the audio to be recorded. It is also advisable to make a short test recording at the beginning to get to know the functionality of the LectureTube Studio before you create recordings for your lectures. It is best not to upload this test recording to LectureTube so that it does not appear in your LectureTube series with the regular videos. If necessary, you can download it locally on your computer.
You can move your browser's notice about the screen sharing in progress to any position or hide it altogether.
In this case, you can split the entire screen. When the slide show is started in PowerPoint, this makes no difference as no other content is visible. After recording, you can crop the video directly in LectureTube Studio front and back to the actual length of the lecture, so that the application change is not visible when the video is uploaded to LectureTube.
The cuts made via the LectureTube Studio are only applied if you subsequently upload the video to LectureTube. With a local download, you currently only receive the uncut version. Therefore, it only makes sense to use the editing function if you want to upload the recorded video to LectureTube afterwards.
LectureTube Upload self-recorded videos
Each video may be up to 1.5 GB in size so that you can upload it via TUWEL. The size limit is also displayed directly in TUWEL. You can compress larger videos using the open source software HandBrake, for example. For slidecasting, typically no more than 500MB of memory is needed for one hour of video material. If you encounter problems compressing videos, please contact: support@lecturetube.tuwien.ac.at
Basically, any video that can be played by a browser can be uploaded. All accepted file types are displayed in TUWEL.
We recommend using the MPEG-4/H.264 video format.
LectureTube Upload can be found via the entry "LectureTube" in the left menu of your TUWEL course of the respective course. Click on the button "Add video" to access the upload function.
The left menu in TUWEL can be shown and hidden again with the menu icon in the upper left corner.
LectureTube Recording and Live Stream in the lecture hall
A recording is made in each lecture hall for which you schedule a LectureTube recording via TISS. Therefore, with Room2Room Streaming, it is sufficient to schedule a recording via TISS only for the source auditorium in which the lecture takes place.
You can see this information on the room information page in TU coLAB, opens an external URL in a new window.
First select your target lecture hall in which you want to play the stream of the source lecture hall. In the line "Streaming possible from auditorium", the respective channel number is indicated next to the auditoriums, which you must select on the touch panel in the target auditorium. In lecture halls with newer touch panels, the name of the lecture hall is displayed directly on the touch panel so that you do not have to look up a channel number.
You can cancel your LectureTube recording up to 10 minutes before the start of the recording via the Lecture Administration in TISS by removing the checkmark for "LectureTube" from the scheduled appointment and saving your changes in TISS. You can also upload your self-recorded video to your LectureTube series via LectureTube Upload in order to make all your videos available in a LectureTube series via e.g. TUWEL. A guide for LectureTube Upload can be found in the LectureTube Knowledge Base, opens an external URL in a new window.
Yes, a LectureTube recording and a LectureTube Live Stream are independent of each other. If you need a live stream, you must activate it manually via the touch panel in the lecture hall. This is done regardless of whether a scheduled recording is already running or not.
Recordings scheduled via TISS, on the other hand, start and end fully automatically in the lecture hall and should therefore not be started or ended manually via the touch panel.
No, the live stream is only switched on and off with a button called "Stream Control". The "Recording Control" buttons, on the other hand, refer to the recording and should ideally not be pressed in order not to disturb the automatically starting recording and the assignment of the recording to the correct course.
As soon as the recording has started, the status display at the bottom of the touch panel changes from "Recording is off" to "Recording is on". Furthermore, you can check the status of the video via your TUWEL course. To do this, click on the entry “LectureTube” in the TUWEL course of the lecture (accessible via the “More” option in the navigation bar). For recordings in progress, "Recording" (red flashing octagon symbol) is displayed as the status in this overview.
The button under "Stream Control" lights up and at the bottom of the touch panel the status display changes from "Streaming is inactive" to "Streaming is active". You can also call up the live stream yourself via the "LectureTube Live" activity in TUWEL to check it. Please note that there is no feedback effect and that there is a latency of approx. 6 seconds when transmitting the live stream.
Yes, the live stream is independent of a recording and can also be switched on and off without recording via the touch panel. However, a recording of teaching content is generally recommended in order to make the content accessible at a different time for students who cannot attend a lecture or who would like to repeat the course material. You can also restrict the visibility of LectureTube recordings via TISS to the TUWEL course only.
The layout setting "Split" is used to record another input, such as a presentation or the image from the document camera, in addition to the camera image. One advantage of this setting is that the view of the camera and input can also be changed afterwards by the viewers.
If you want to record two windows on your laptop, it is best to arrange them next to each other and transmit your screen as input, e.g. via HDMI.
Yes, in addition to predefined camera positions that you can call up via the touch panel, you can also zoom in and out of the camera image using the plus and minus buttons. With the arrow keys, you can also point the camera in all four directions so that your content is easy to read.
What is recorded is what is shown to you in the preview on the touch panel. For example, if you select a layout that displays the camera image next to the presentation, the camera image will not be projected next to the presentation above the projector, although it will be recorded. You can also call up the live stream via TUWEL to check the recording. This corresponds to the image that is recorded in the lecture hall during a scheduled recording. Please note that there is no acoustic feedback.
Yes, therefore the image of the recording can also be checked via the live stream in TUWEL. However, the recording will be cropped to the actual length of the lecture at the front and back before it is published.
Yes, for LectureTube recordings and live streams, a lecture hall microphone must be used so that the sound can be transmitted. At the beginning of your session, make sure that the microphone is switched on and that you can hear yourself in the lecture hall. If you need both hands to present, you can also use the lapel microphone. Make sure this is stable and positioned near your mouth for good sound quality without noise.
If you have problems with the technology in a teaching room, please first read the technical manual available in each room. If you require further support, you can contact the Central Support for Teaching via the hotline (01 58801) 40040 or via the service portal: Service Desk, opens an external URL in a new window.
All the guides for the LectureTube services can be found in the LectureTube Knowledge Base, opens an external URL in a new window.
Yes, the live stream must be manually started in the lecture hall at the beginning of the unit and manually stopped again at the end of the unit. The selection in TISS only serves as information for students.
All the guides for the LectureTube services can be found in the LectureTube Knowledge Base, opens an external URL in a new window.
Via the LVA Administration in TISS you can change the visibility of your LectureTube series to "Public" and save your changes. With this setting, the videos of your series can be accessed worldwide.
In TISS, navigate to "LVA Administration" and click on the tab "E-Learning" under "Announcement" in your course. In the section "LectureTube" you can create the series for your course and define its visibility. Furthermore, you can plan the recording dates in the lecture hall here.
No, you only need to select the checkboxes of the confirmed room bookings of the LVA (green tick) in TISS, set the desired visibility of the LectureTube series, and save your changes. The recording times are taken from the confirmed room booking, whereby one minute is added to the start time to avoid collisions. As soon as the recording dates have been successfully created, you will receive an automatic confirmation by e-mail listing all the scheduled recording dates for your lecture.
No, for recordings in the lecture hall there is no notification as soon as a video is available in the LectureTube series. You can view the current status of your videos at any time in your TUWEL course.
No, the newly saved camera presets are retained and are not automatically reset.
The recording layout is reset to a default setting at the time of the recording start so that all recordings in the same auditorium start with a uniform layout. Therefore, if you want to change the recording layout, always make this change after the recording has started.
Yes, you can change the selected input as often as you like, even during recording.
It is always recommended to take another person with you for support. Start the live stream in the source lecture hall and select the current stream of the source lecture hall you want to play in the destination lecture hall.
If the document camera is not already switched on, switch it on first. Then select the document camera as input via the touch panel.
You can change the lighting in the room, turn on the document camera lighting itself, and focus and zoom in on the document camera image.
You will need to switch on the auditorium microphone and ensure that the sound is heard throughout the auditorium.
Yes, if the mouse pointer is visible on the beamer or touch panel, it will also be visible in the recording.
No, the live stream only works in one direction. Therefore, it is advisable to use a Classroom Response System, for example, to be able to receive questions and feedback from students during a lecture.
TU Wien offers Mentimenter as a Classroom Response System. More information about Mentimeter can be found at the digital tool catalogue.